This post may contain affiliate links. Please read our disclosure policy.
Follow my simple process to learn how to make ghee from butter. Rich and full of beneficial fatty acids and fat-soluble vitamins, ghee is simple to prepare at home, much more affordable than store-bought options, and perfect for a variety of recipes thanks to its high smoke point and rich, nutty, buttery flavor.
Also referred to as a form of clarified butter , traditional ghee is a staple in Middle Eastern and Indian food. Clarified butter in its very pale form is a staple ingredient in many Lebanese recipes, particularly Lebanese baking. Emblazoned in my memory is pretty much every woman among my mother and aunts, standing over a pot at the stove.
They were slowly melting butter to clarify it. In other words, evaporating the water and removing the milk solids results in pure butterfat. Their mission was most often to use the clarified butter in Lebanese baklava (or, for Sitto, her spanakopita). If they had used standard melted butter, the solids would burn on the delicate phyllo, leaving black spots on the beautiful pastry.
Once I learned how to make clarified butter, or ghee, from a pound of butter, I never looked back. Budget-friendly, simple, and honestly fun to make! This method transforms simple butter into rich, golden butter oil every single time. I’ll walk you through the entire process for making your own ghee, creating liquid gold from scratch!
What is Ghee?
If you’re unfamiliar, ghee is made by slowly heating butter so the water evaporates and the milk solids separate from the butter fat. As the butter cooks, the milk proteins and whey proteins sink to the bottom. A middle layer of clear, golden milk fat forms on top. For standard clarified butter, we do not wait for the solids to brown and fall. Instead, we skim them off as needed.
This process of browning the solids creates a rich, nutty product with a deep buttery flavor. Does this sound like brown butter to you?! Me too! But there is a difference: with brown butter, those solids are essential and left in the butter for flavor. With ghee, they are filtered out entirely. Because the milk solids are removed, ghee is lactose-free, shelf-stable, and ideal for high-heat cooking like sautéing or deep frying.
Compared to regular ghee or basic clarified butter, traditional ghee is cooked longer, allowing the solids to brown slightly and enhancing both aroma and flavor. As a result, ghee can generally be used in most recipes that call for butter oil. Personally, I love it for cooking steak or pan-seared lamb chops. Or simply spread on toast!
Ghee vs. Butter
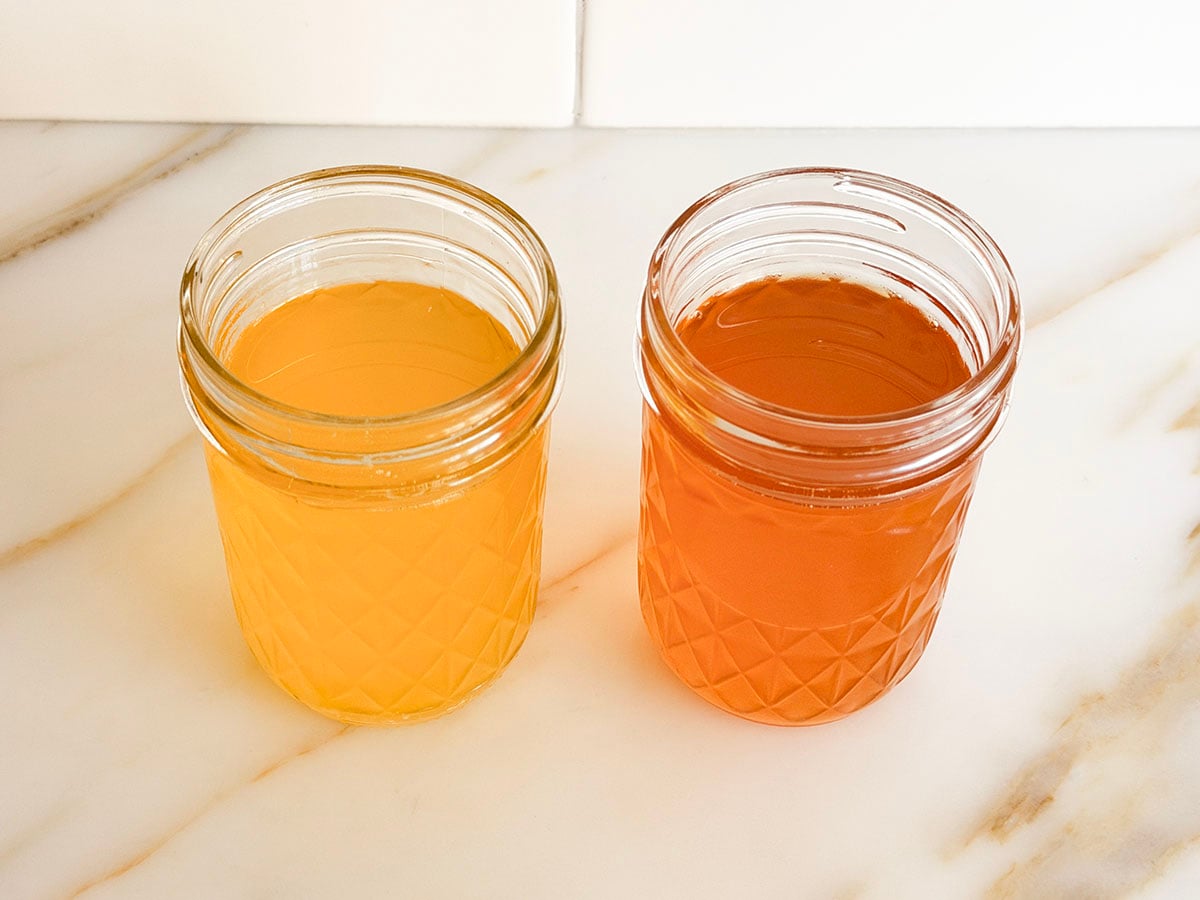
Ghee and clarified butter are typically used interchangeably, but they aren’t exactly the same thing. Ultimately, ghee is a type of clarified butter. That said, both foods start with regular butter, which will then simmer until the milk solids separate.
At this point, you have clarified butter. The solids are either floating atop the butterfat or they have settled at the bottom of the pot. I find that is often the case when you clarify European-style or cultured butter).
However, ghee cooks even longer, allowing the milk solids to cook and brown. The depth of browning, slightly or deeply, depends on the flavor profile you’re after. This is what creates its signature golden color and distinct flavor.

How to Make Ghee at Home
Below is an overview of my process. Please be sure to scroll down to the recipe card below for the complete ingredient list and details!
Ingredients
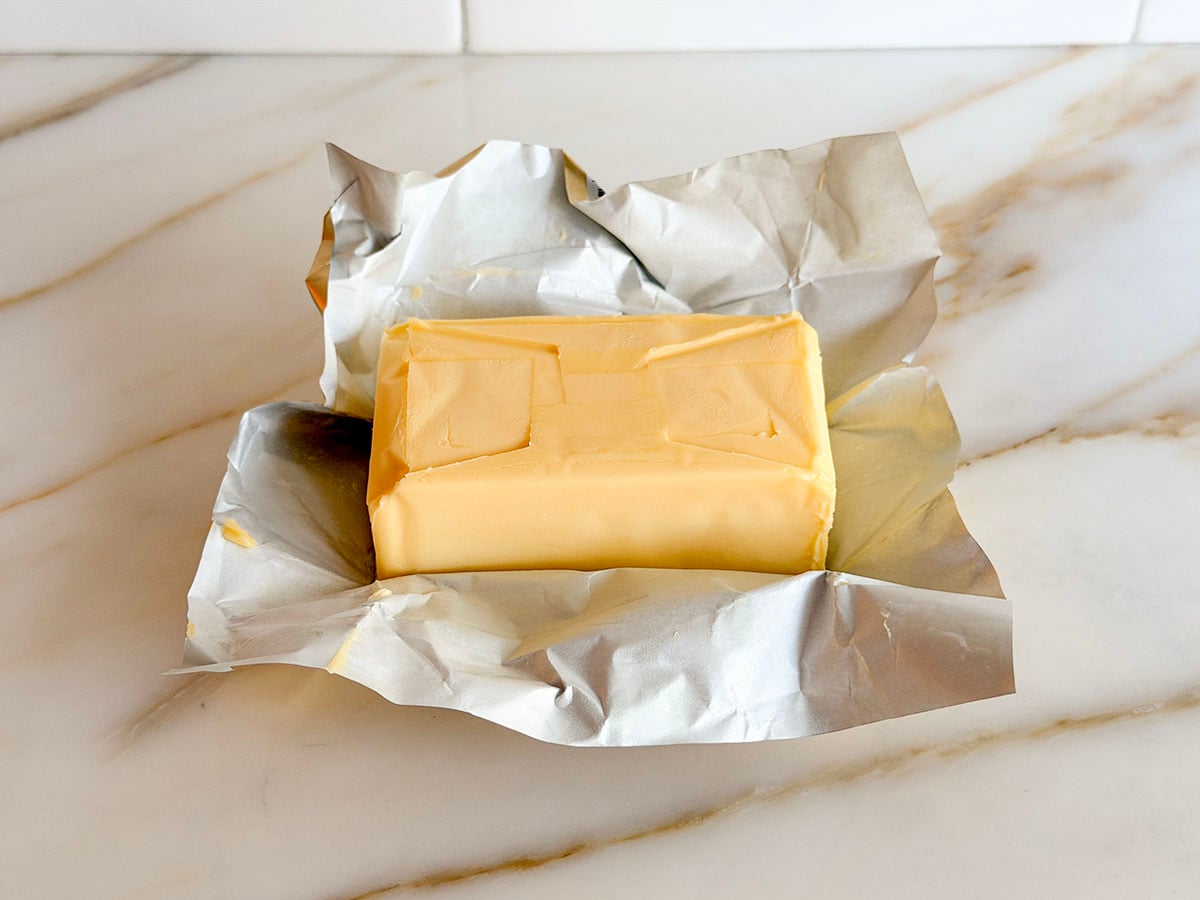
- Butter – Use unsalted or salted butter, depending on your preference. You can start with homemade butter, but store-bought is more typical. Look for a high-quality European or cultured butter, which contains a higher percentage of butterfat, for the richest ghee. Organic butter or grass-fed butter will also yield the best taste. Use as much butter as you like–I tend to use a pound and store it so I have the ghee or clarified butter on hand at all times.
Instructions
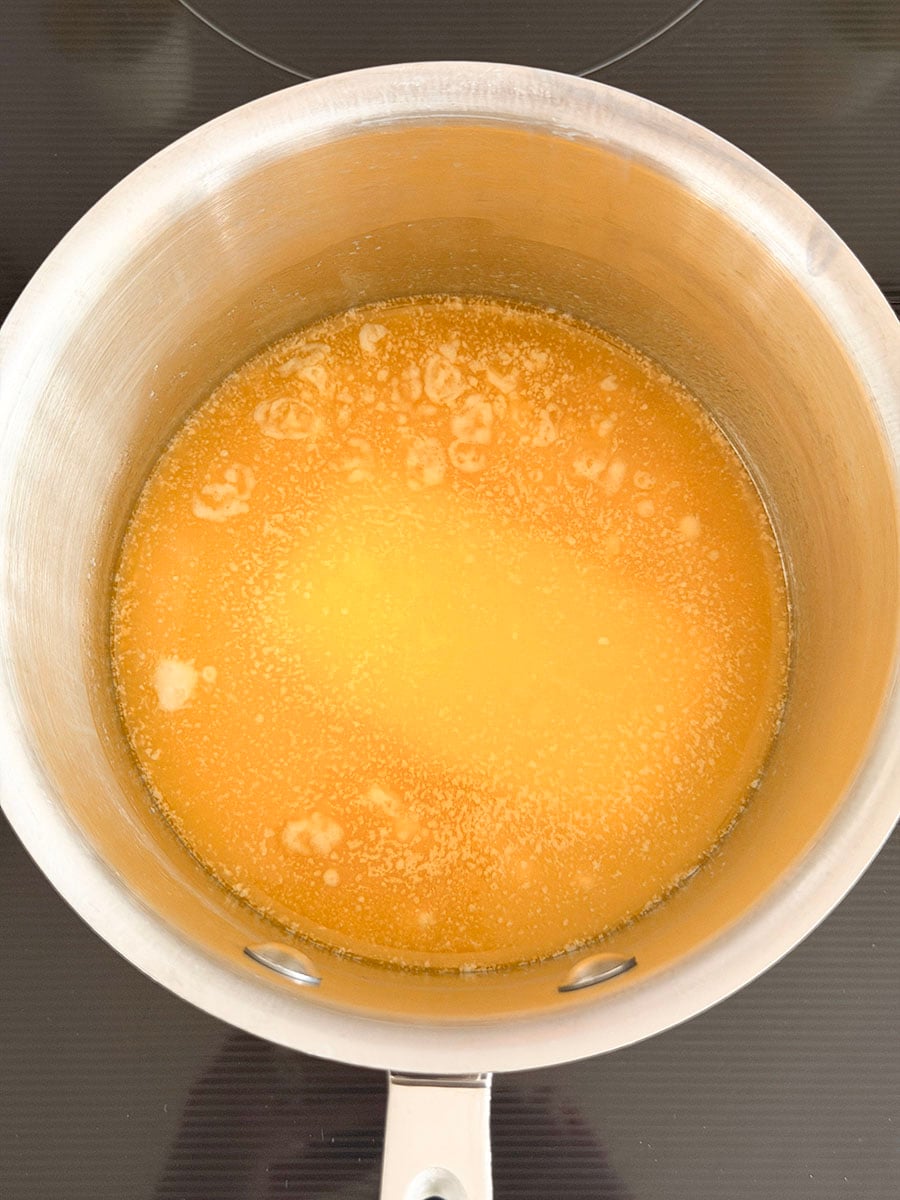
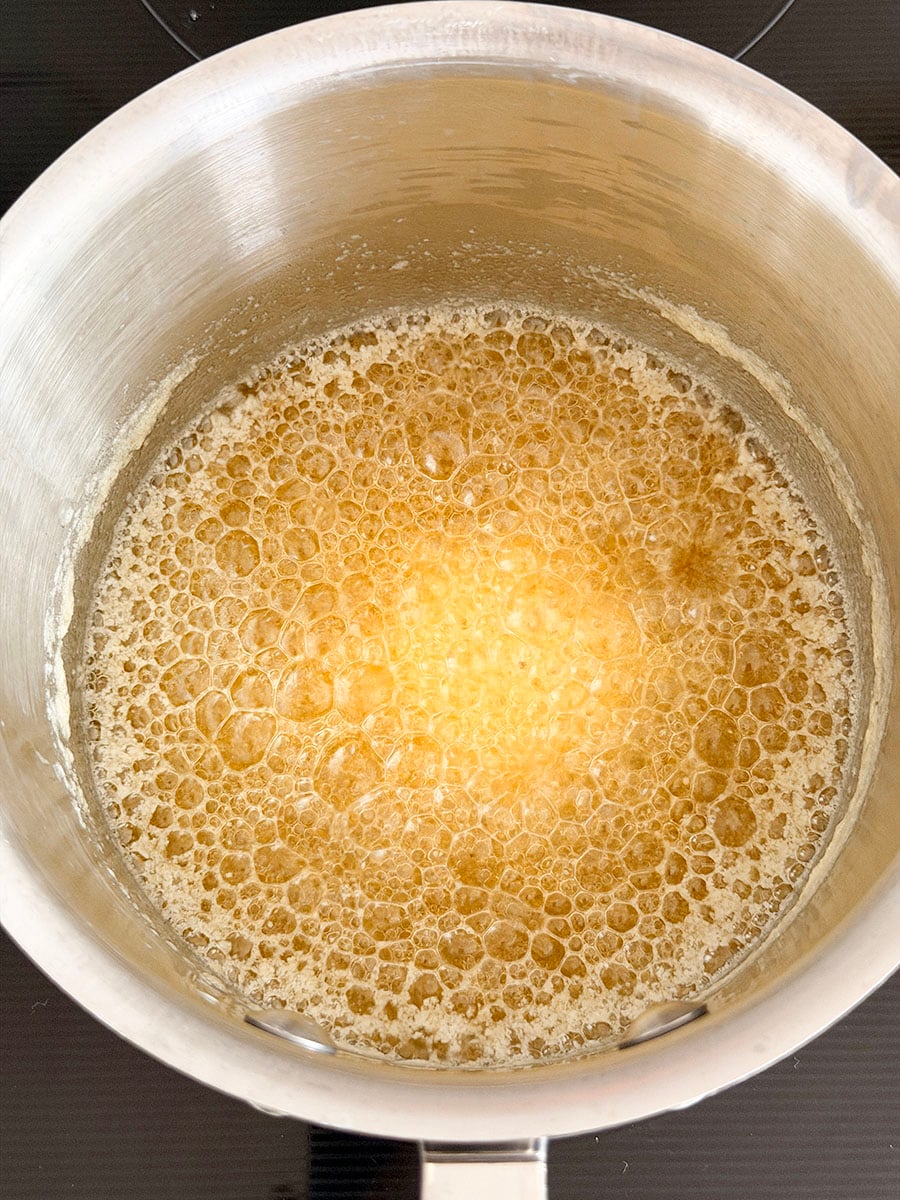
- Melt the butter. Heat the butter in a small or medium heavy-bottomed pan over medium-low heat, letting it melt completely. Don’t stir or disturb it during this time, and be sure to pay attention to the temperature of the butter, keeping it steady. You can adjust the heat up and down to move the process along, but take care to reduce the heat if the butter starts to splatter when it hits boiling.
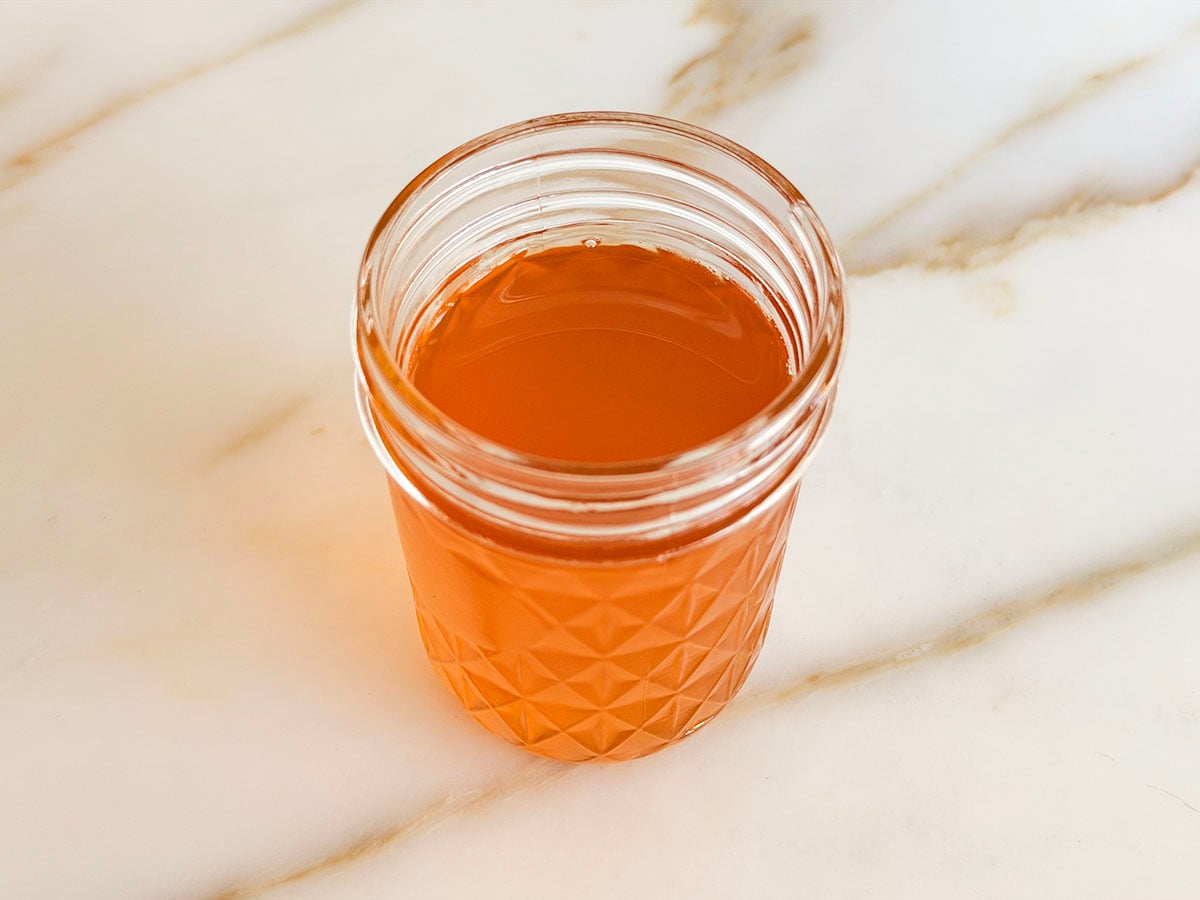
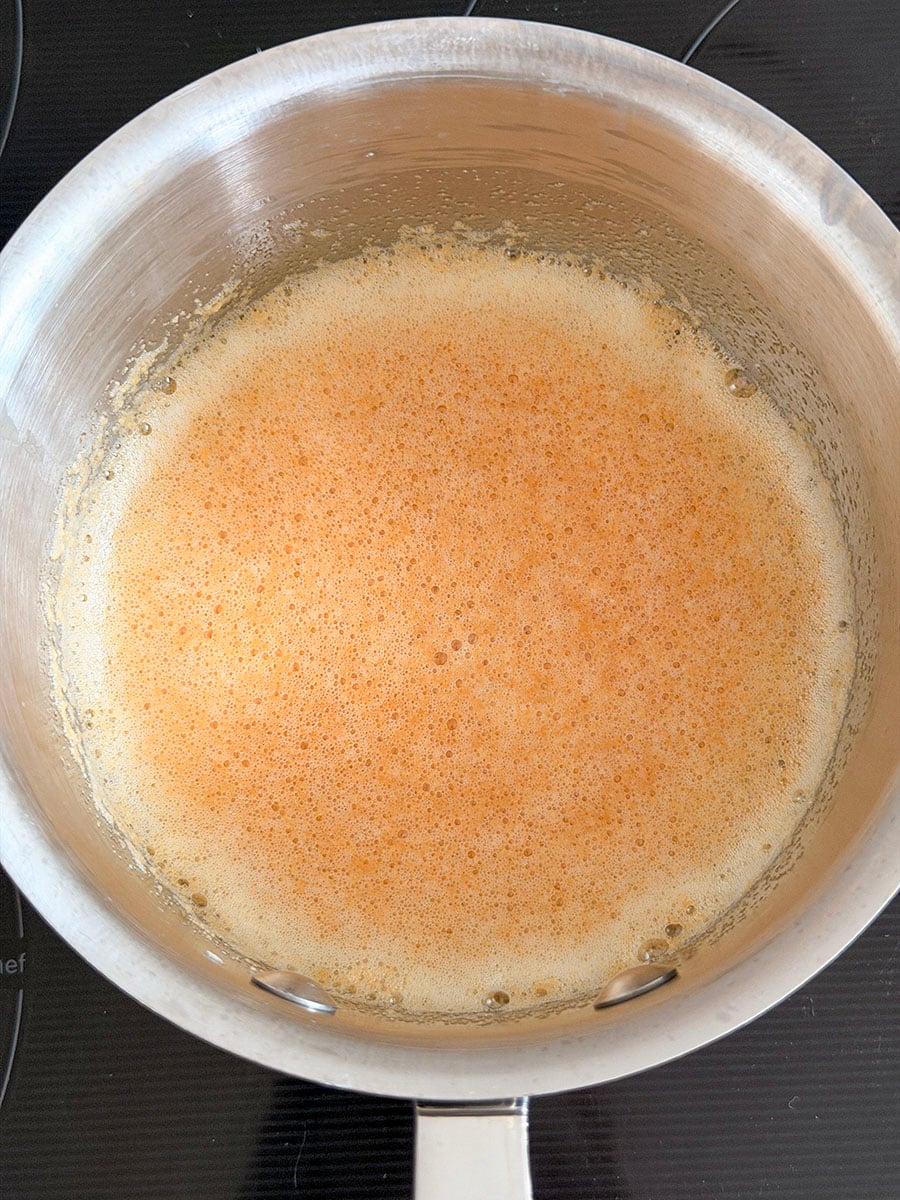
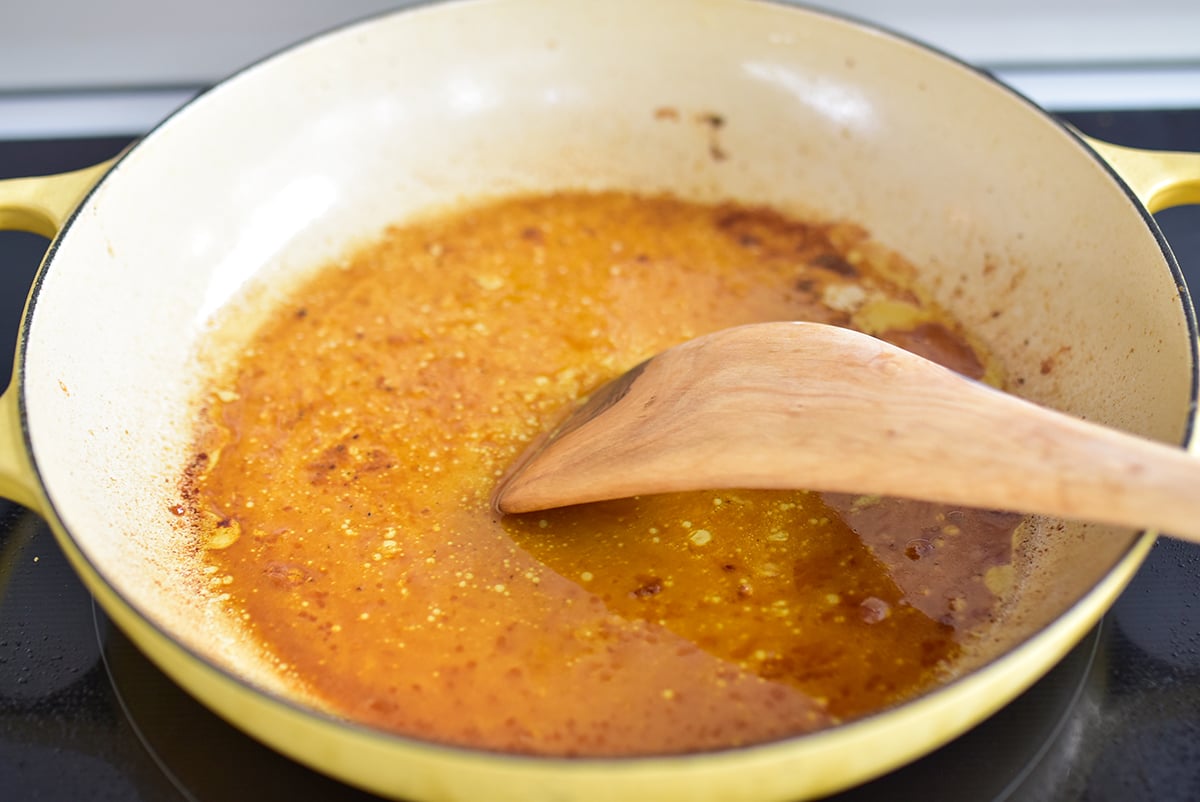
- Continue to cook. Once melted, let the butter simmer until the milk solids turn from milky froth to a clear boil as they sink to the bottom of the pan. Then a foamy layer on top forms with a deep golden brown hue that indicates the solids are browning at the bottom of the pan. In other words, as the cooking time progresses, you’ll notice foam forming on top and solids settling. The milk proteins will sink, forming that distinct bottom layer while the clear golden liquid develops above.
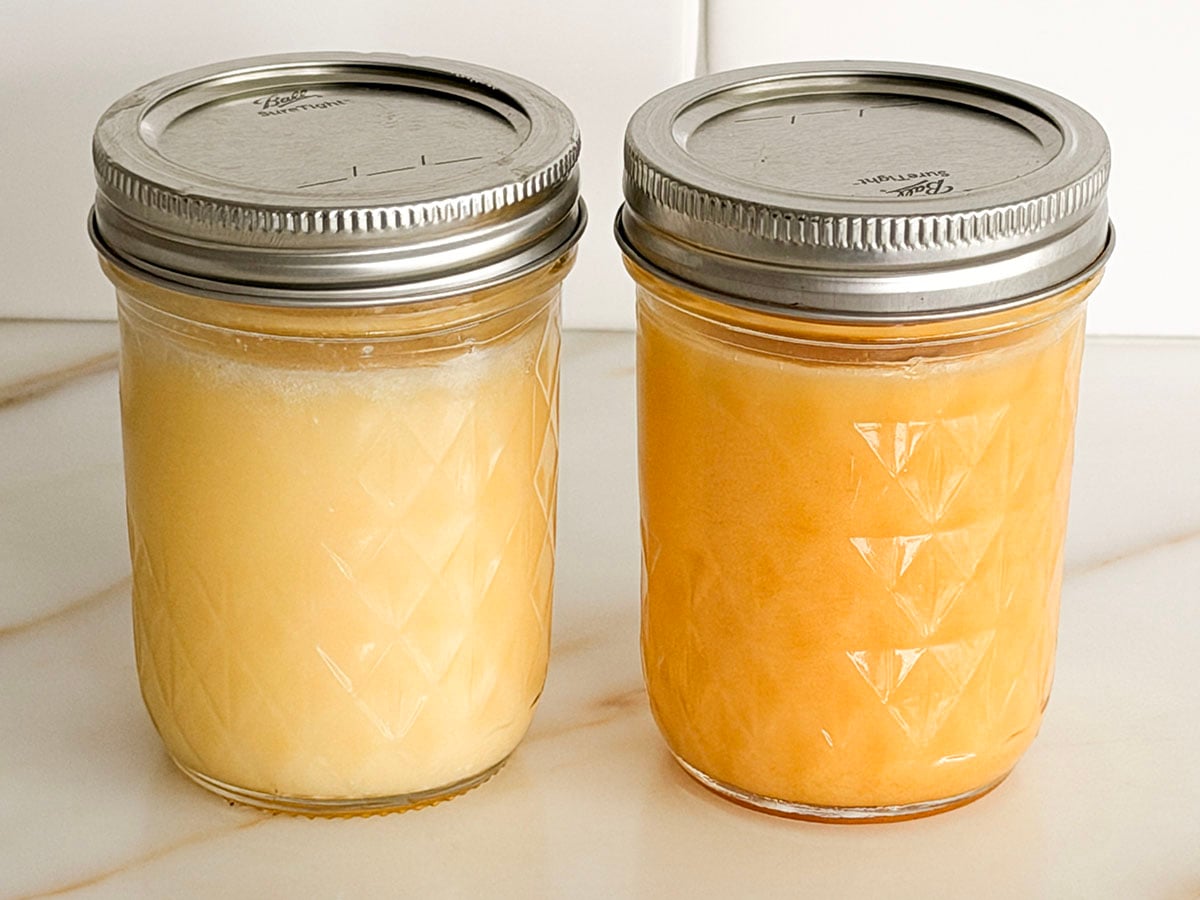
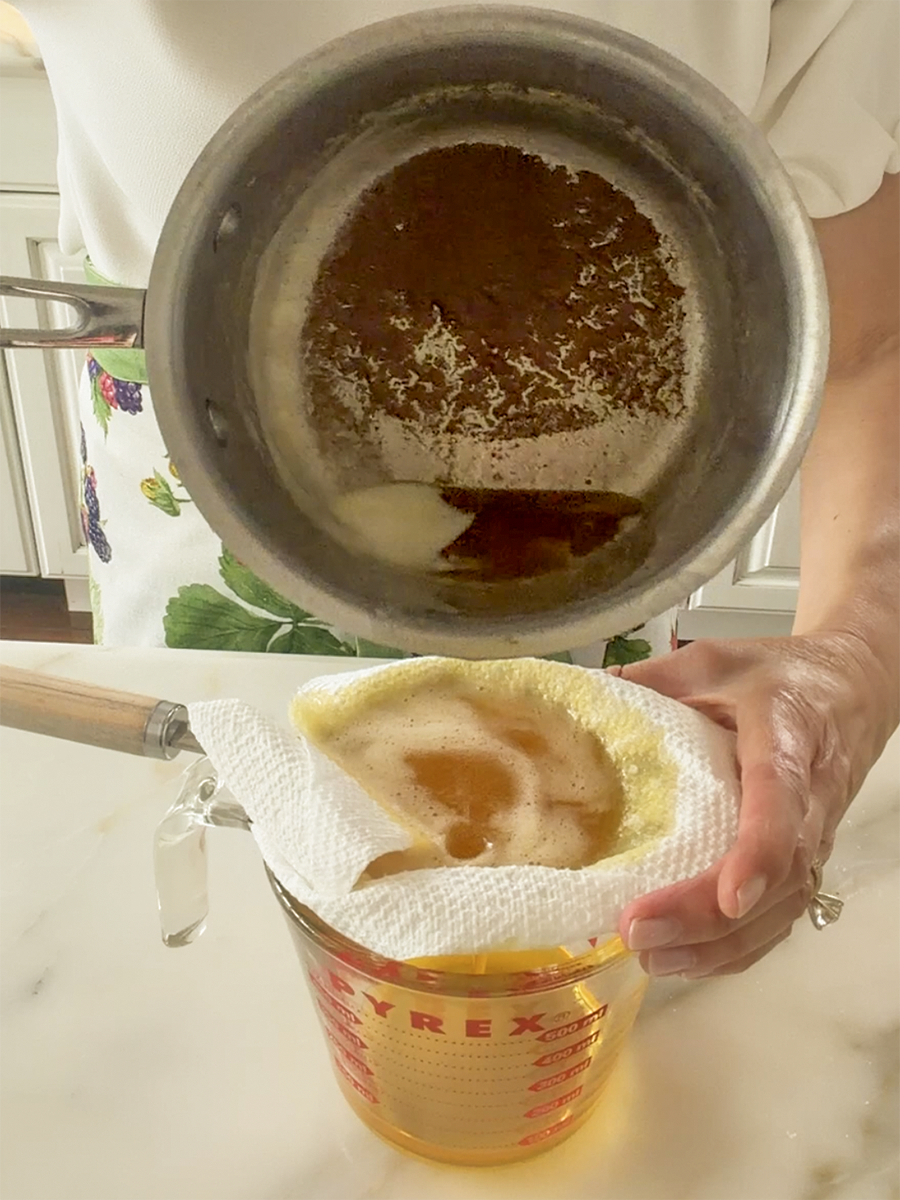
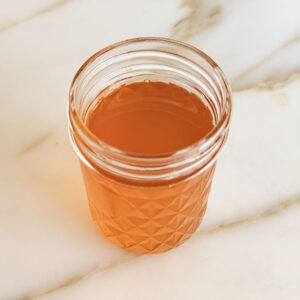
- Strain. Pour the butterfat through a fine-mesh strainer lined with paper towel, and set the milk solids caught in the paper aside. They’re delicious stirred into halwa, added to pastry dough, or stirred into Lebanese rice, soups, and cookies for extra richness! If you are using salted butter, the solids may be very salty, so taste before adding to other recipes. From here, your ghee is ready to use, or let it cool at room temperature to store.


Ways to Use Homemade Ghee
I use ghee almost daily in both sweet and savory dishes. Some of my favorite uses include:
- Sautéing and frying: Use ghee in place of (or in addition to) olive oil, regular butter, or vegetable oil to sauté vegetables, cook eggs, or pan-sear meats, like my filet mignon recipe. It’s especially great for high-heat cooking because it has a higher smoke point than other fats, which means it won’t burn as easily with high-heat cooking.
- Roasting vegetables: Toss potatoes, carrots, cauliflower, or Brussels sprouts with melted ghee, salt, and spices before roasting for deeper flavor and beautifully crisp edges.
- Drizzling over grains: Add a spoonful of warm ghee to rice, quinoa, couscous, or bulgur pilaf for a simple but luxurious finish.
- Finishing meats and seafood: Melt a little ghee over grilled steak or filet mignon, roasted chicken, or pan seared fish or baked fish just before serving to enhance richness and flavor.
- Spreading and dipping: Use ghee as a spread for warm pita bread, flatbread, or toast, or serve it alongside bread as a simple dip with a sprinkle of sea salt or herbs.
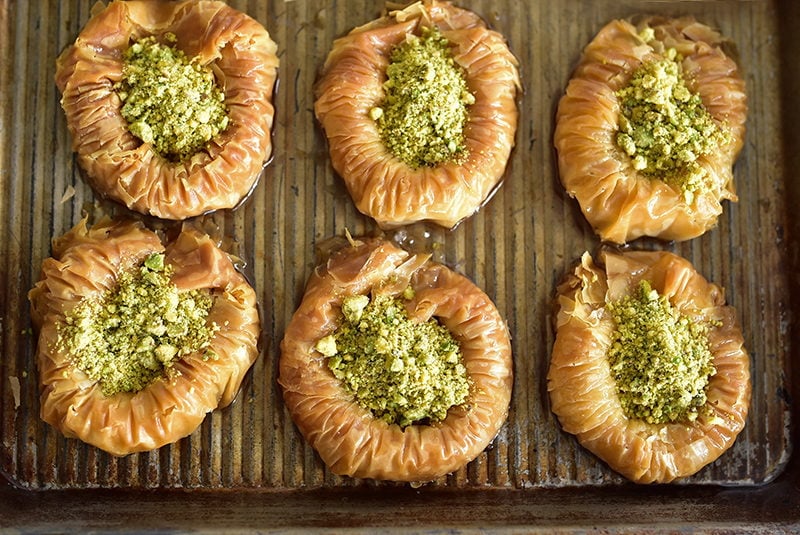
- In baking: Many Lebanese baking recipes call for clarified butter; you can substitute ghee for a subtle nutty flavor. It’s especially delicious in cookies, such as graybeh (though here the pure white cookie will be more golden in color with darker ghee), ma’amoul, cakes, and quick breads. And of course, baklawa of all kinds.
- With spices and aromatics: Bloom spices like garlic, cumin, coriander, or turmeric in ghee to build a flavorful base for soups, stews, and sauces, like Lebanese lentil soup or red lentil soup.
- For breakfast: Drizzle ghee over oatmeal, pancakes, waffles, or even scrambled eggs for a rich, satisfying taste.
- In traditional dishes: Ghee is a staple in Middle Eastern, South Asian, and Indian cooking and is a great addition to rice pilaf, lentils, curries, or to finish soups and braises.
- As a finishing touch: A little bit stirred into warm dishes, like soups, olive oil mashed potatoes, or cooked greens like spinach, adds a silky texture and depth of flavor that makes everything taste just a little more special.
How to Make Ghee
Equipment
- 1 Saucepan
Ingredients
- 1 cup butter, unsalted or salted
Instructions
- Place the butter in a small or medium saucepan over medium low heat.
- Melt the butter, completely undisturbed and uncovered, until fully melted, about 5 minutes.
- Continue cooking until the milk solids turn deep golden brown and sink to the bottom of the pot, adjusting the heat up or down to move the process along (increase the heat) without the butter sputtering (lower the heat), another 10 minutes or so. The butter will have milky solids on top at first, then clear bubbles as they sink and the butter simmers, then a foamy top. Keep a close eye on the pot and remove it from the heat once the foam forms on top, as the solids can burn quickly as they brown at the bottom of the pot. Move the foam aside with a spoon to monitor the browning.
- Use a fine mesh strainer and pour the butterfat through it into a jar or other container with a lid. Set aside the remaining solids for another use, or discard.
- Store, covered and airtight, in the pantry at room temperature for up to 3 months, or in the refrigerator or freezer for up to a year.
Nutrition
Nutrition information is automatically calculated, so should only be used as an approximation.