This post may contain affiliate links. Please read our disclosure policy.
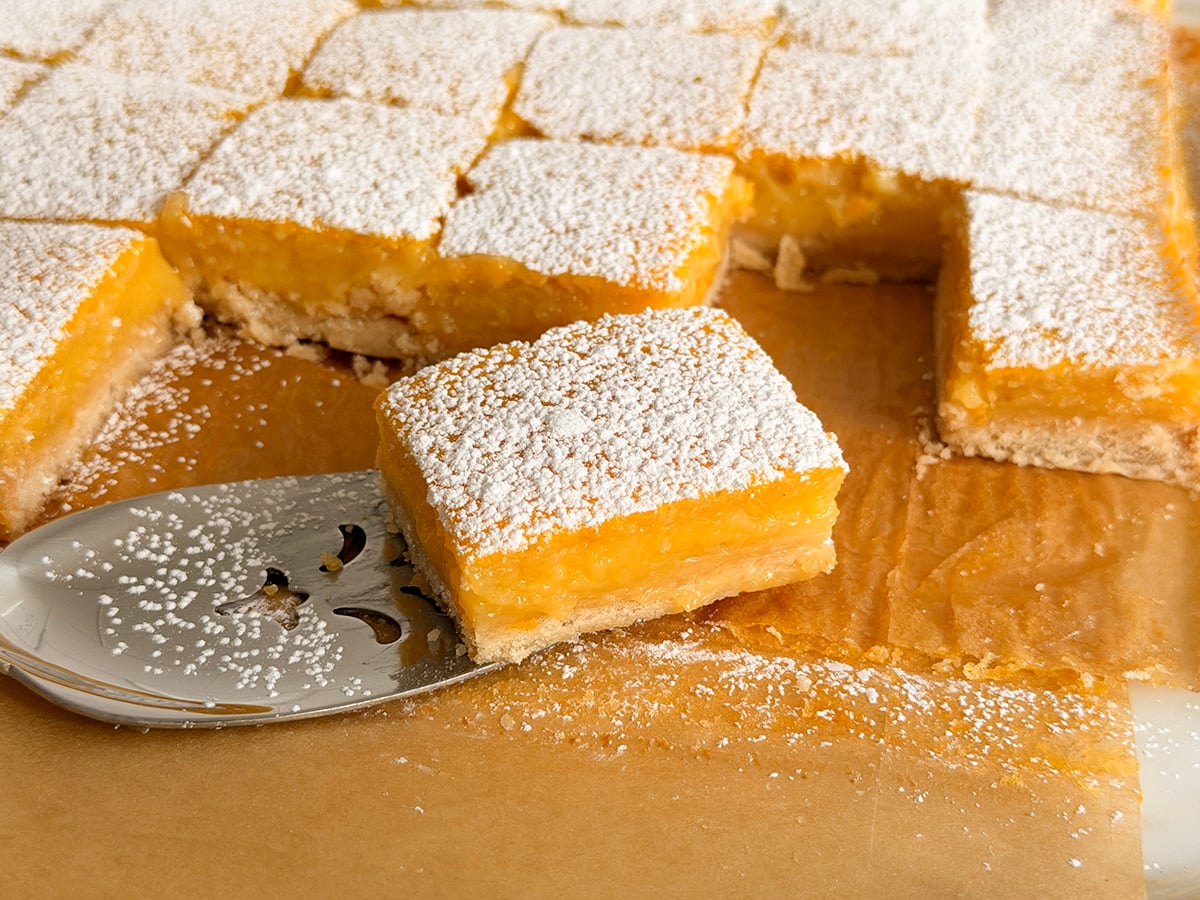
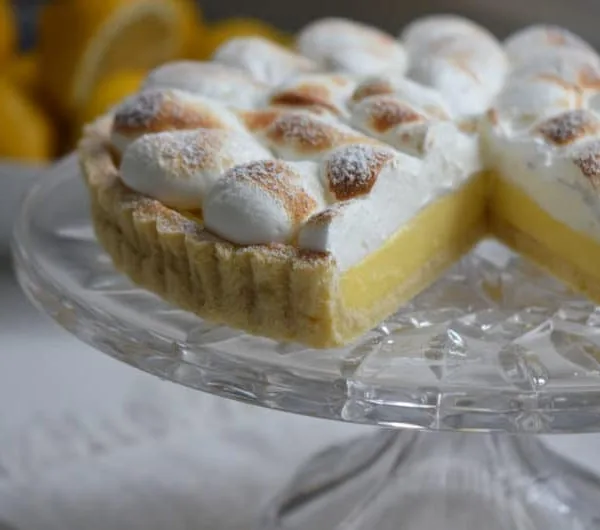
My easy lemon bars recipe features a simple, 4-ingredient crust and a thick lemon filling with a sweet-tart, citrus-forward taste. Inspired by my mom’s original recipe, these bars are simple, delicious, and especially perfect for spring and summer.
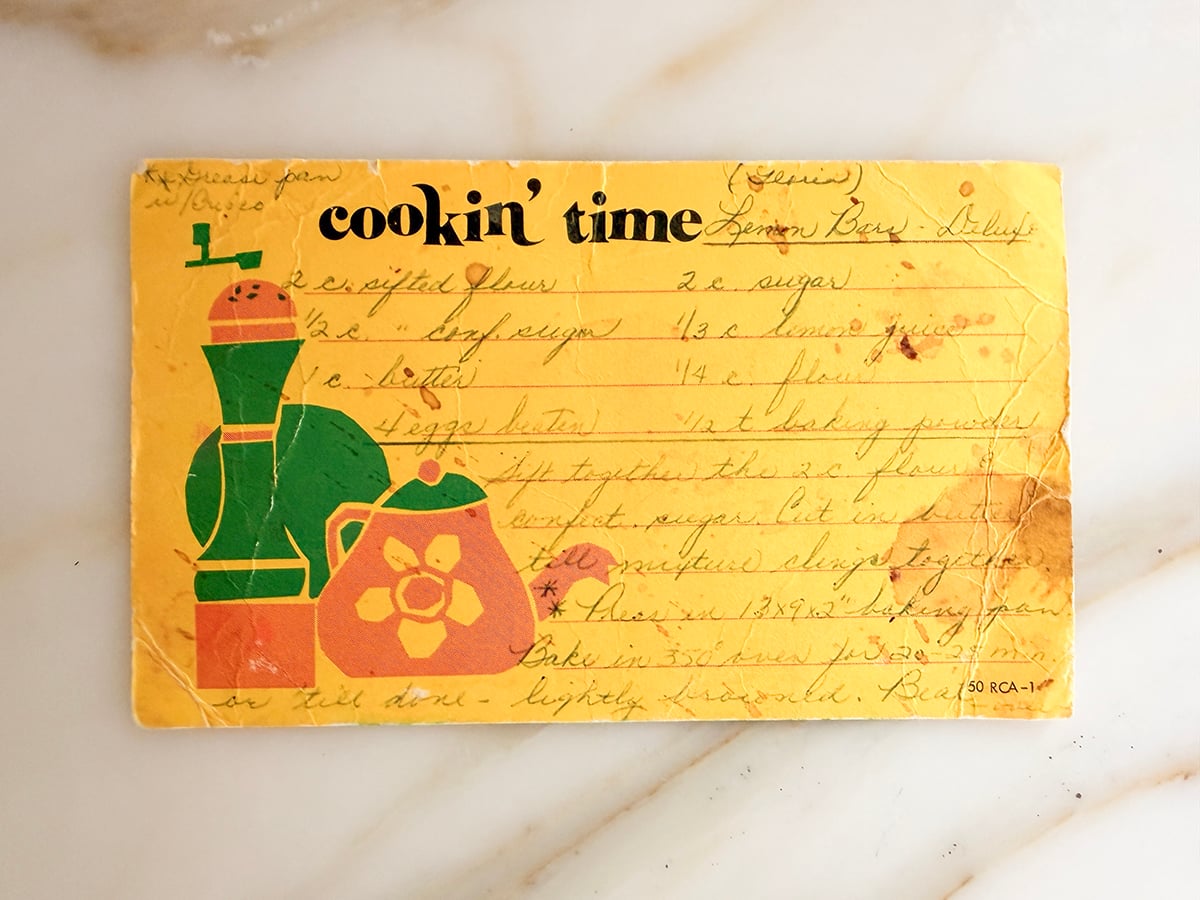
I adore all lemon desserts, from lemon cake to lemon meringue tart and lemon meringue pie, but lemon bars hold a special place in my heart. We have an old recipe card from Aunt Gloria that is lemon yellow and bears her beautiful, old-fashioned handwriting. It’s a well-loved recipe by the looks of the card! Mom made them for lots of special events, and every spring, my sister pulls out the recipe and gets after it for whatever is on deck in any given year: a baby shower, graduation parties, and just casual gatherings, too.
I’m a dedicated loyalist when it comes to preserving traditions, but when a recipe needs … more…I give it more! Unlike Aunt Goria’s recipe and many other classic lemon bar recipes I’ve seen, which tend to be very sweet with a bold, buttery shortbread crust, my version is unique in that it places a strong emphasis on the lemon taste, letting the citrus shine through. As a result, it offers the perfect balance of tart lemon filling, buttery crust, and just enough sugar to satisfy your sweet tooth. One taste of how lemony these are and I tell you, there’s no going back to standard lemon bars!
The recipe comes together with simple ingredients, two bowls, and foolproof steps in about an hour for an easy dessert that is beautiful, too.
Ingredients and Notes
These are just a few notes about the key components. Please be sure to scroll down to the recipe card for the complete details!
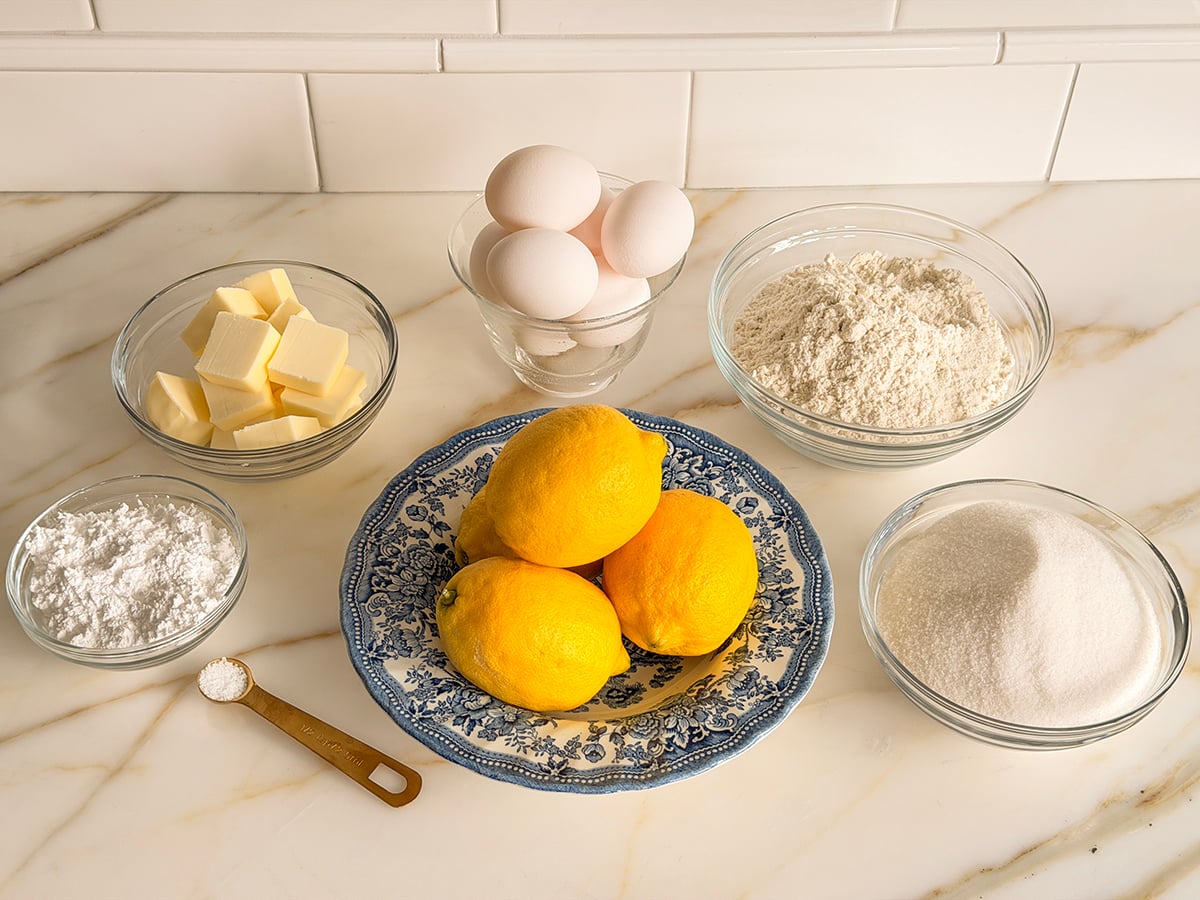
- Flour – All-purpose flour forms the base of the crust and adds structure to the filling, helping to create a thick, almost lemon curd-like consistency that holds its shape..
- Confectioners’ Sugar – Also known as powdered sugar, this melts into the crust, creating a slightly sweet taste that differentiates it from a more savory option, like coconut oil pie crust.
- Melted Butter – Because butter’s rich flavor! Melting the butter helps combine the dry ingredients easily, for a cohesive crust. I use unsalted butter, but salted butter will also work.
- Granulated Sugar – This sweetens the lemon filling, and using just enough to balance the tartness of the lemon.
- Fresh Lemons – I use a whopping four lemons for both fresh lemon juice and lemon zest for the filling, for that bold lemon flavor I’m after. My lemon bars have a slightly stronger, more tart lemon flavor than other varieties. So, I recommend using standard Eureka or Lisbon lemons for the best taste, though Meyer lemons will work in a pinch.
- Eggs – 7 large eggs give the filling a soft, rich flavor while still maintaining a thick, structured texture. Many recipes will call for fewer eggs (and less amounts overall), but you’ll notice that those are for smaller batches in 8- or 9-inch pans. My recipe bakes in a larger 13x9x2-inch pan.
How to Make Lemon Bars

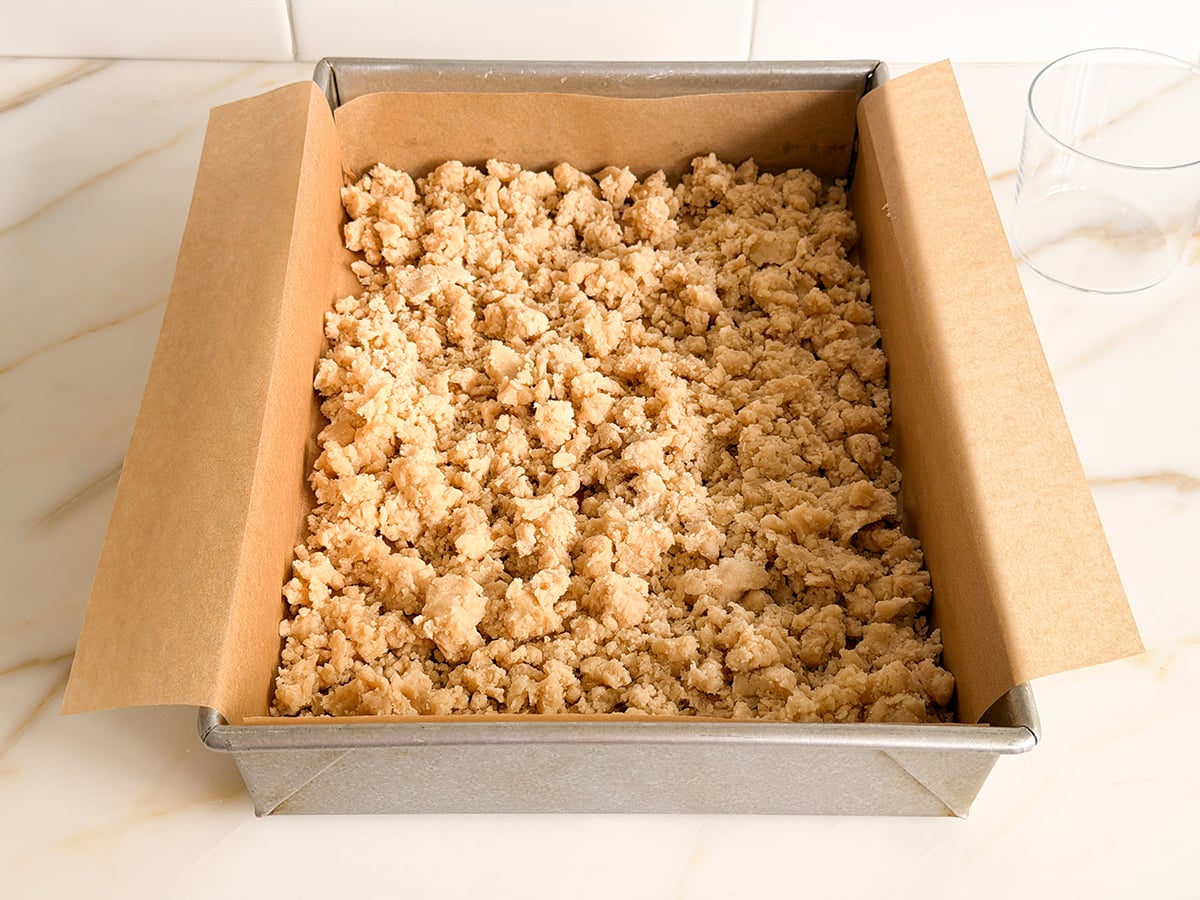
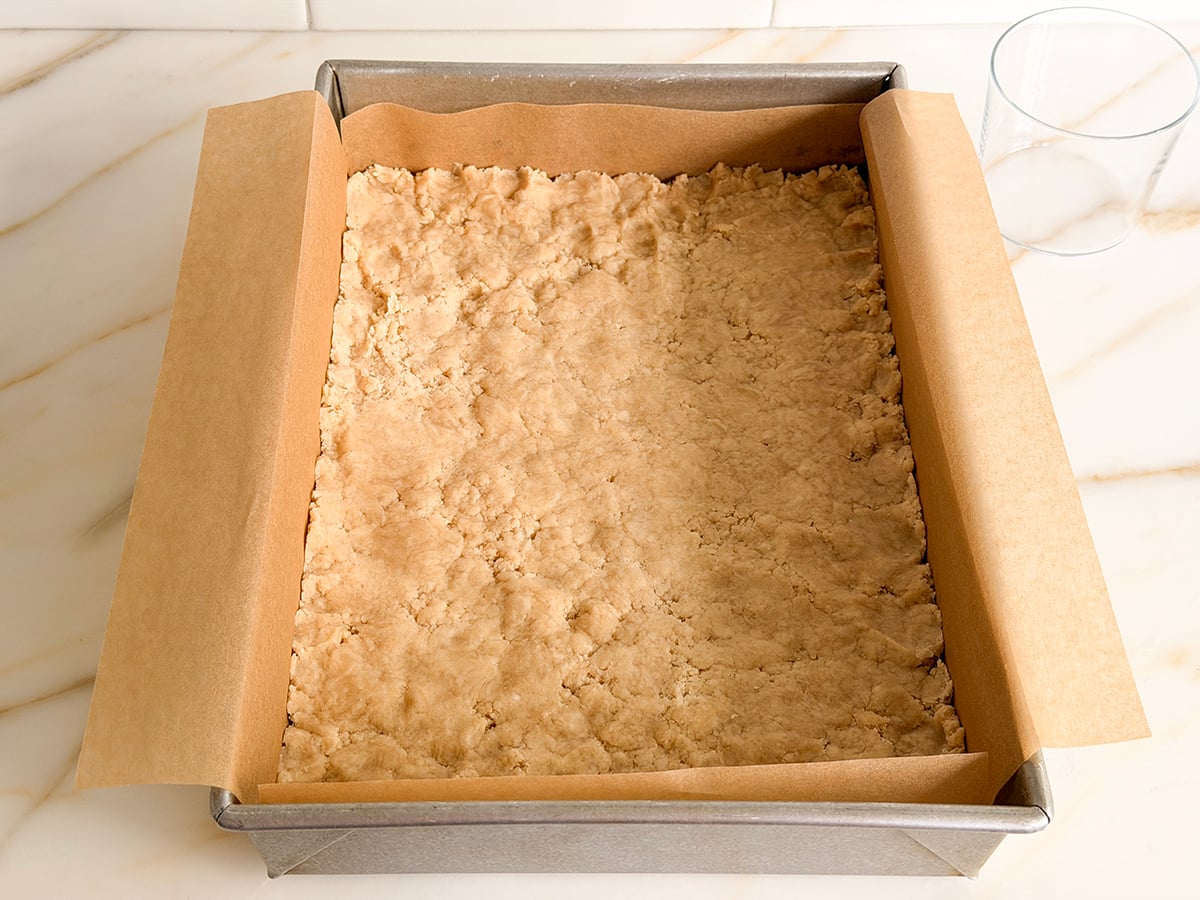
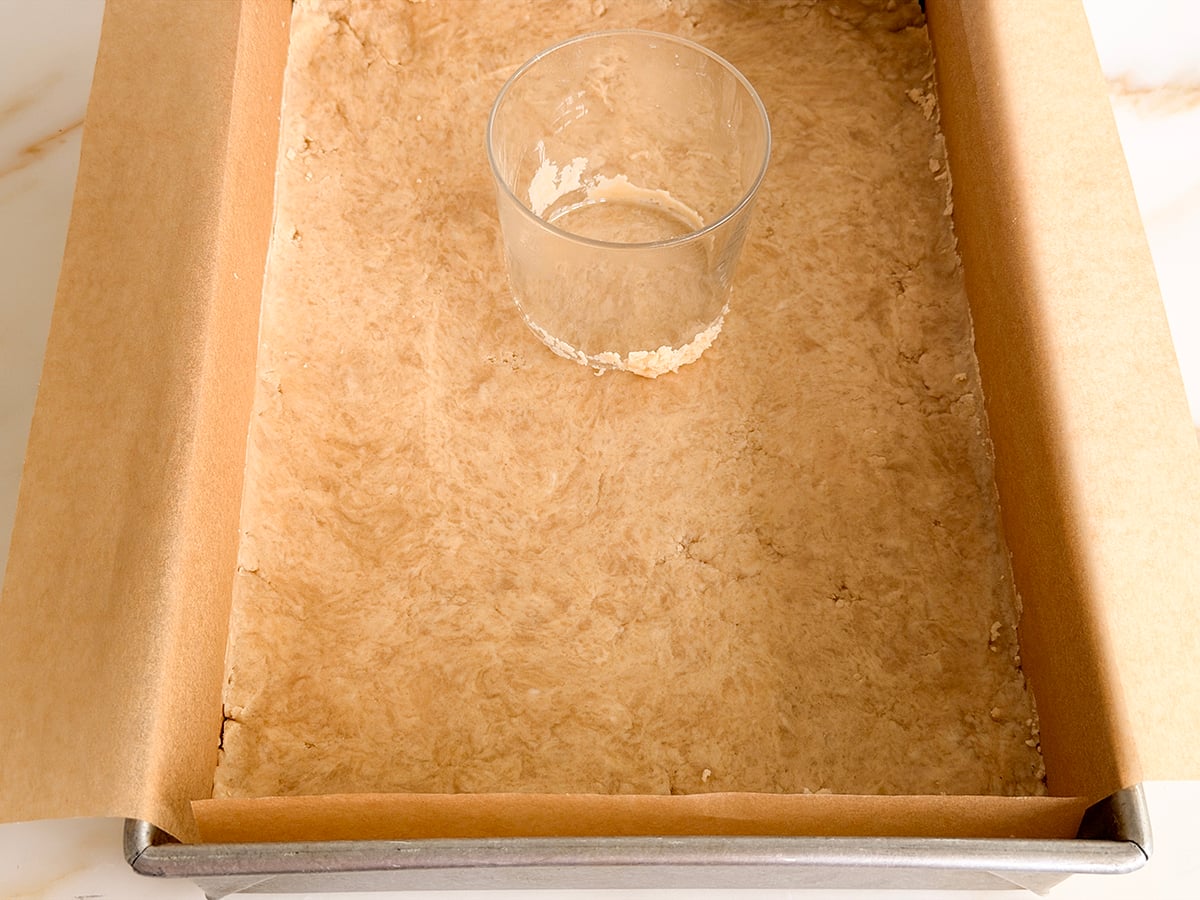
- Prepare the crispy shortbread crust. Whisk the dry ingredients in a large bowl with a wooden spoon. Then, add the butter, and mix with a spoon or your hands just until no dry streaks remain. Crumble the mixture evenly into the baking dish, then press it down to smooth any cracks. Use a glass pan or metal pan, adjusting the cook time as needed. My preference is a metal pan because it has square edges, but be sure to use a parchment sling to prevent the lemon from reacting (metallic taste). Bake on a center oven rack until the crust is golden brown.
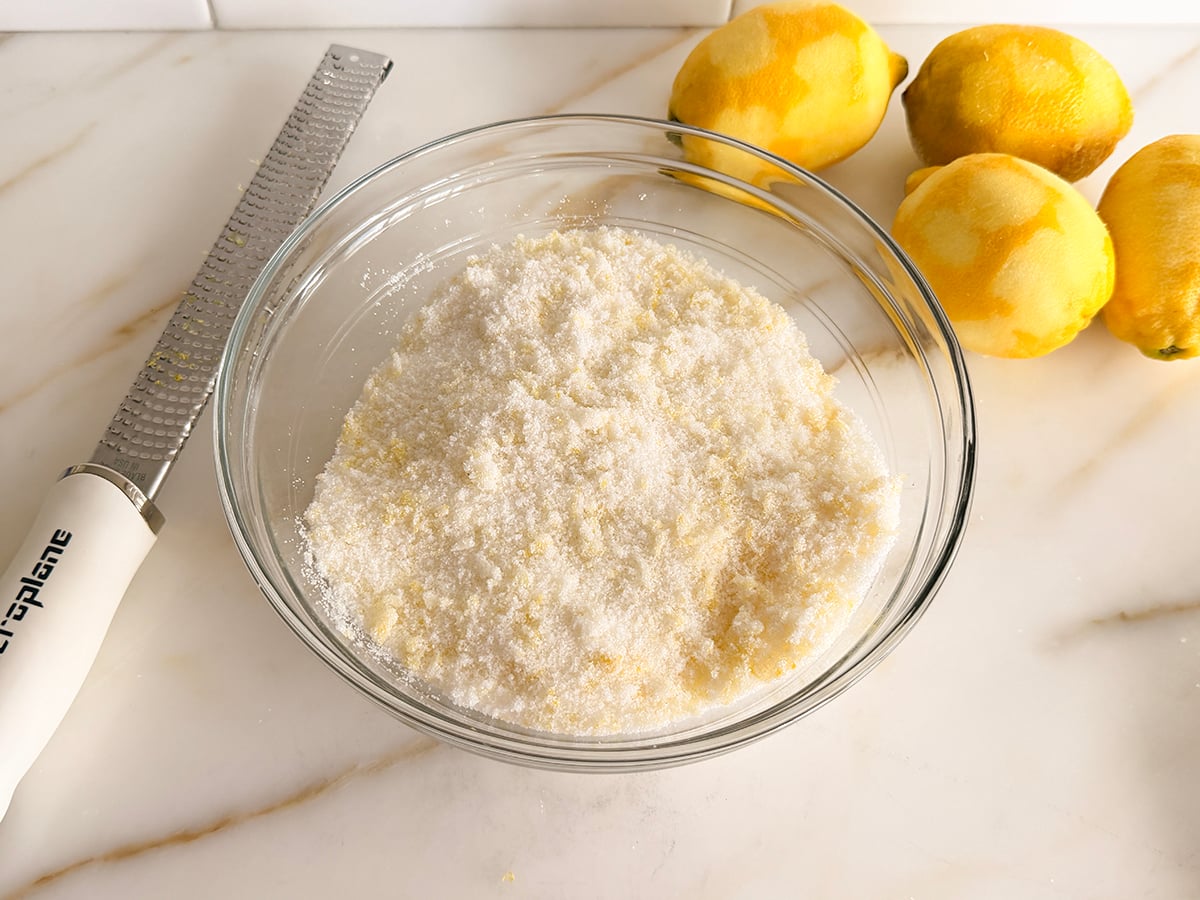
- Make the filling. While the shortbread base bakes, start the filling by rubbing the sugar and lemon zest in a second mixing bowl. I find that using your fingers is the best way to do this, releasing the natural oils from the lemon to flavor the sugar. Heaven scent! You could also use a food processor, but why dirty up another dish? Then, whisk in the flour to properly disperse it, then the remaining ingredients until smooth.
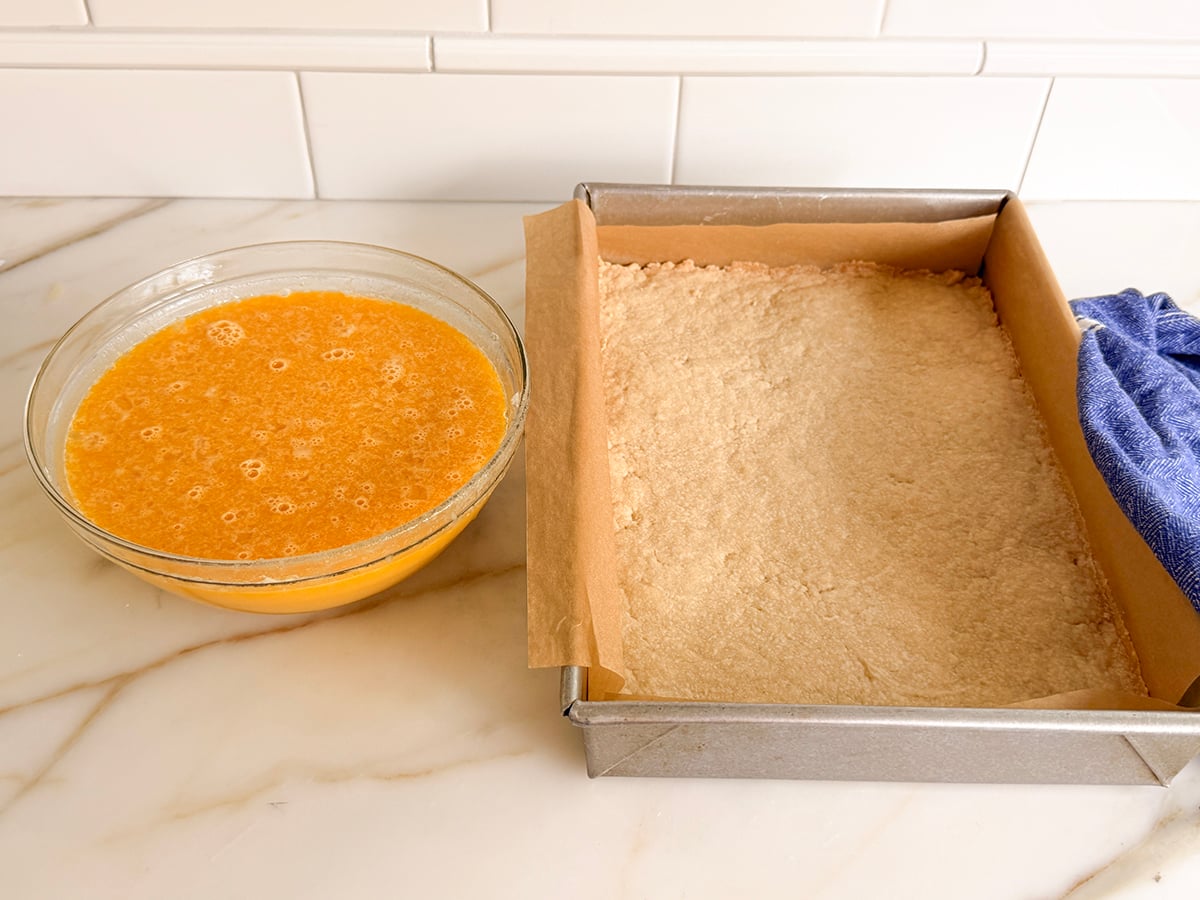
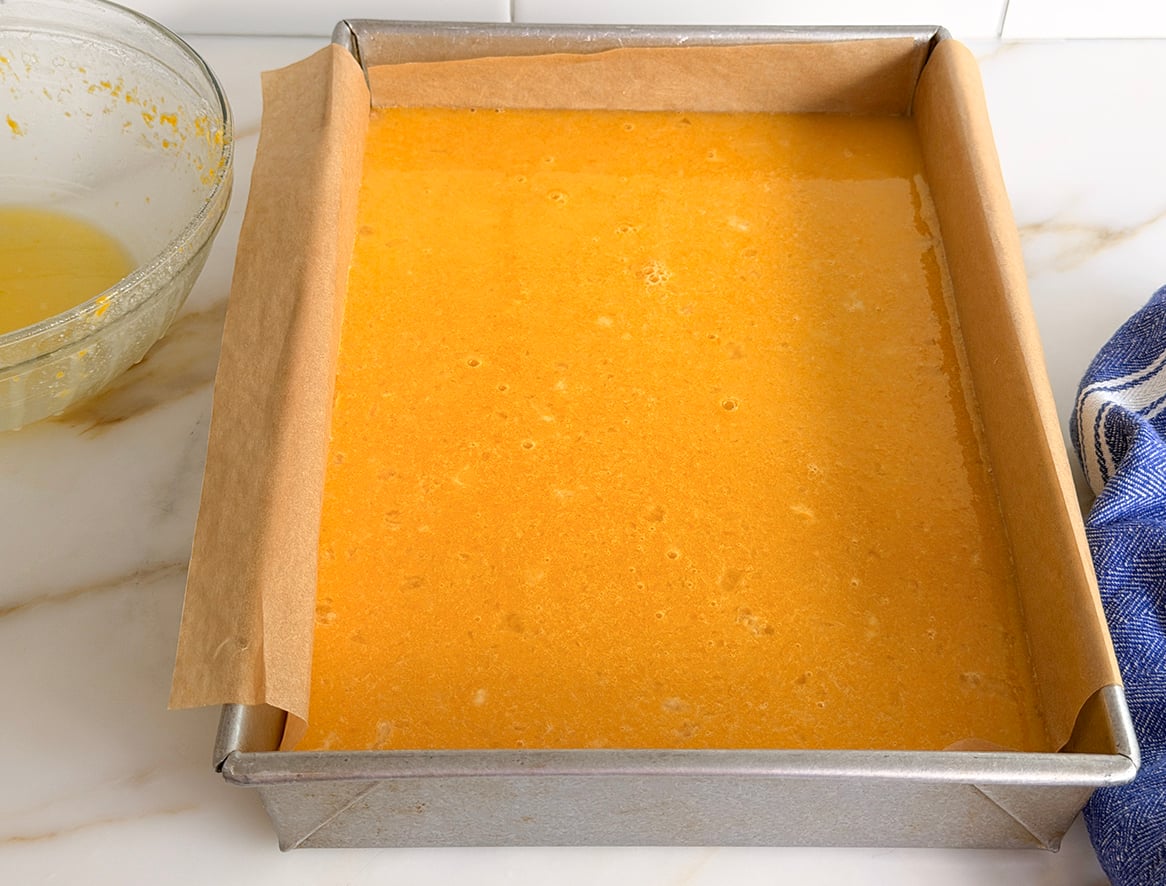
- Layer. Pour the lemon layer into the hot crust, and continue to bake just until the filling is set. You’ll know the center is done when it’s lightly browned around the edges and jiggles just slightly when shaken!
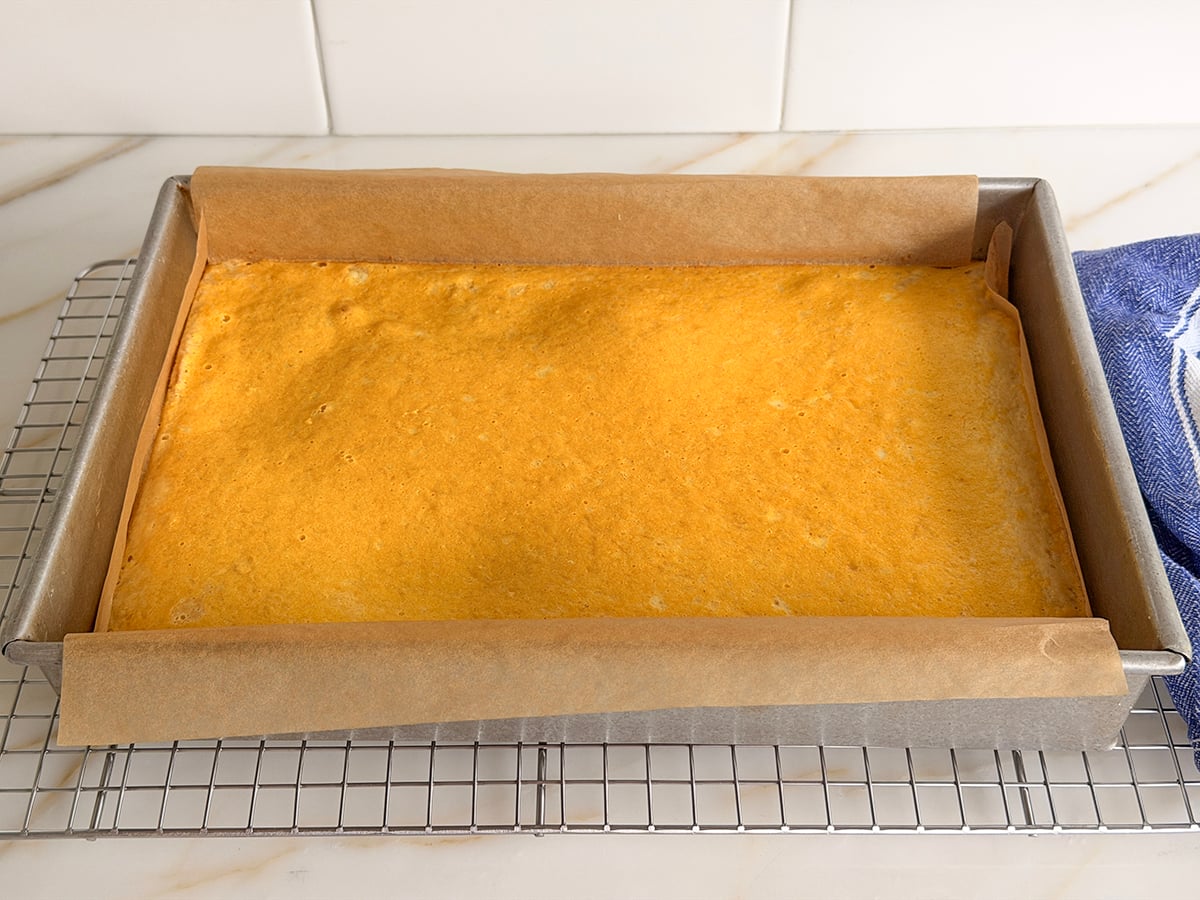
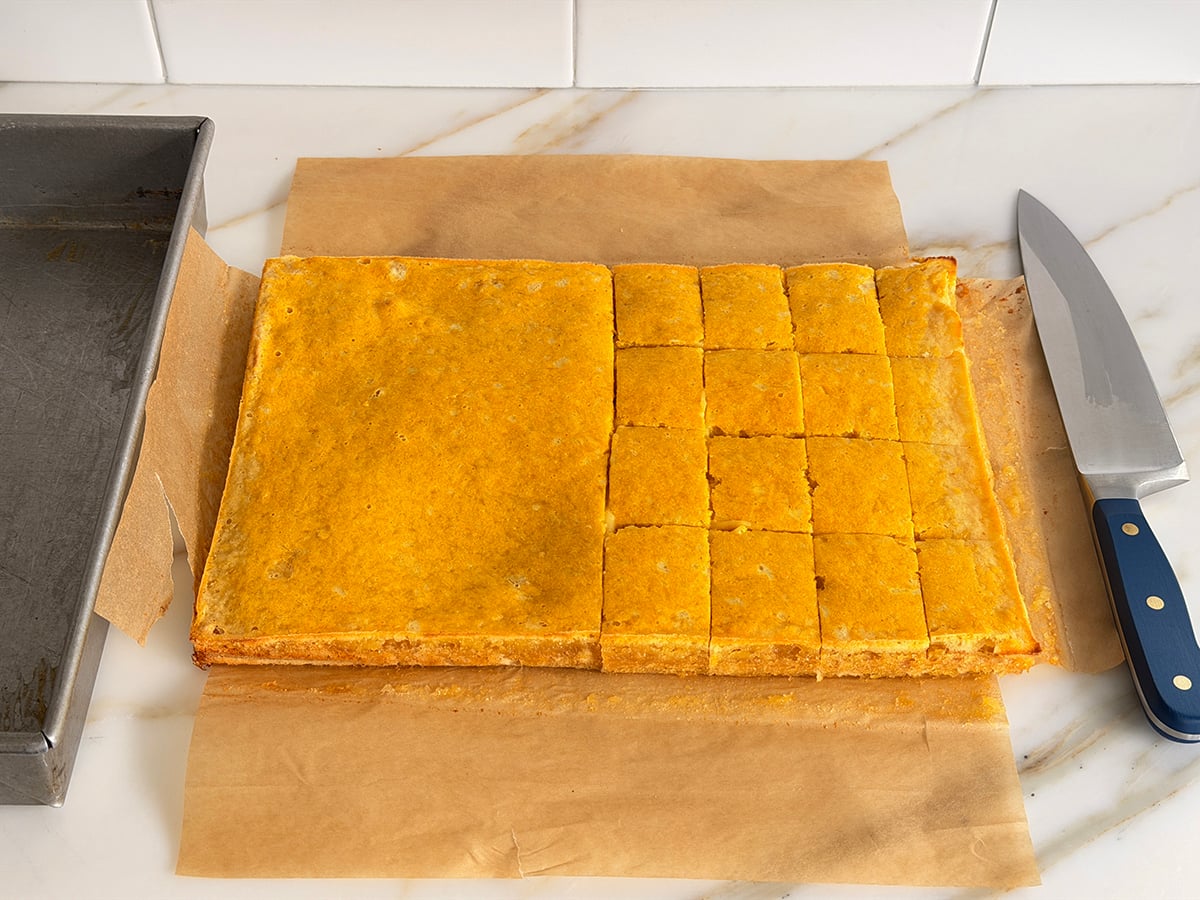
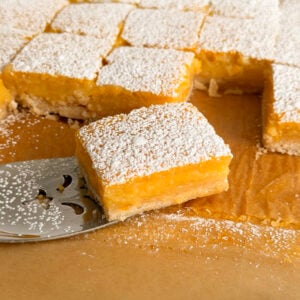
- Cool. Let the lemon squares cool completely in the pan at room temperature and cool even further in the refrigerator. Then, slice, sprinkle the top of the bars with a dusting of confectioners’ sugar, and enjoy!


My Top Tips for Success
- Avoid overmixing. Stir the ingredients just until smooth. Overmixing the filling can cause air bubbles; we’re after a smooth and creamy lemon curd filling.
- Don’t underbake the crust. The baked crust should look set and lightly golden before adding the filling. This prevents a soggy bottom and gives you a perfect tender-but-sturdy base.
- Pour the filling into a hot crust. Adding the filling while the crust is still hot helps it set quickly and creates a clean layer between the crust and filling.
- Avoid overbaking the filling. This is key for the best lemon bars! The center should have a slight jiggle when you gently shake the pan, similar to strawberry cheesecake. Overbaking can lead to a rubbery texture instead of a soft, custardy finish.
- Use a lined baking pan, letting parchment paper hang over the edges to create a sling. This makes removing the bars effortless and helps prevent sticking. It’s also important if you are using a metal pan because the metal and cause a metallic flavor with the lemon.
- Be sure to cool the pan fully before cutting. Otherwise, the bars will not have clean edges and will ooze. Wiping the knife each time you make a cut also ensures a clean cut.
- Swap the citrus. Use orange zest and orange juice from blood oranges to suit your personal taste and create pretty pink bars.
- Dust with confectioners’ sugar when ready to serve. Keeping the bars cold in the refrigerator extends shelf life and tastes great. The powdered sugar is best sifted over the bars just before serving. It’s also best to do this after cutting the bars for the best look.
Lemon Bars
Equipment
- 1 (13x 9-inch) Baking Pan
- Parchment Paper
- 1 Medium Mixing Bowl
- 1 Large Mixing Bowl
- 1 Whisk
- 1 Wooden Spoon or Spatula
- 1 Microplane or Zester
- 1 Citrus Juicer (optional, but helpful)
- 1 Flat-Bottom Glass
- 1 Fine Mesh Sieve
Ingredients
Crust
- 2 2/3 cups unbleached, all purpose flour
- 2/3 cup confectioners’ sugar
- 14 tablespoons unsalted butter, melted
- 1/2 teaspoon salt
Filling
- 2 1/2 cups granulated sugar
- 4 tablespoon lemon zest, from about 4 lemons
- ½ cup unbleached all-purpose flour
- 7 large eggs, lightly beaten
- 1 cup fresh lemon juice, from about 4 lemons
- Confectioners’ sugar for serving
Instructions
- Arrange an oven rack in the middle position and preheat the oven to 350°F. Line a 13 x 9 x 2-inch pan with a parchment sling both directions in the pan.
- In a medium bowl, whisk the flour, confectioners’ sugar and salt. Add the melted butter and mix with a spoon until no dry streaks remain. Dough should end up in large crumbles.
- Spread the crumbled dough evenly in the prepared pan. Press the dough into the pan, smoothing any seams, making sure the dough has no cracks. For an even crust, take a glass with a flat bottom and press down on the dough all around the pan to smooth the surface.
- Bake for 20-25 minutes, or until pale golden brown.
- While the crust bakes, make the filling. In a large bowl, rub together the sugar and lemon zest with your fingertips until the zest is completely mixed in and fragrant and damp. Whisk in the ½ cup flour. Add the eggs and lemon juice and whisk until fully combined.
- Remove the baked crust from the oven and pour the egg mixture into the hot crust. Return to the oven and bake for an additional 23-25 minutes, turning the pan halfway through baking, until the filling is set, barely jiggles when the pan is shaken, and is lightly browned at the edges.
- Cool completely for at least an hour. Then chill in the refrigerator until cold before cutting. Cut into bars. Sift confectioners’ sugar evenly over the top just before serving.
Notes
– Store leftover lemon bars in an airtight container in the refrigerator for up to 4-5 days. For the best texture, keep them chilled and dust with fresh confectioners’ sugar just before serving.
– To freeze, place the bars (without powdered sugar) in a single layer or between sheets of parchment paper in a freezer-safe container for up to 2 months.
– Thaw in the refrigerator overnight, then bring to room temperature and dust with confectioners’ sugar before serving.
Nutrition
Nutrition information is automatically calculated, so should only be used as an approximation.
FAQs
Ideally, lemon bars are refrigerated once they’ve cooled. Because the filling is custard-based with eggs, storing leftovers in an airtight container or wrapped with plastic wrap followed by aluminum foil in the fridge keeps them fresh. They’ll last for up to 4-5 days and actually taste even better the next time you reach for them, after they’re nice and chilled.
Lemon bars are ready when the edges are lightly golden, and the center is mostly set with just a slight jiggle when you gently shake the pan. The filling will continue to firm up as it cools, so avoid overbaking, which can make the texture rubbery instead of smooth and custardy.
For clean, neat squares, let the lemon bars cool completely, then chill them in the refrigerator for at least 1-2 hours. Transfer the bars to a cutting board or slice them in the baking pan. Use a sharp knife and wipe it clean between each slice for a clean cut. For extra precision, you can run the knife under hot water, dry it, and slice. This helps glide through the filling without sticking to the cooled bars!


Oops! Forgot the star rating!
Thanks so much Jayne!
Absolutely delicious! I made these yesterday for my book club and everyone thought they were te best lemon bars ever! I added some edible petals along the with the powdered sugar. A lovely spring dessert! Thank you!
Perfect Book Club treat Jayne! Thank you! Love your star-review too if you’re so inclined!!!
These are the best lemon bars! Perfect amount of tartness and lemon flavor. Last time I tried adding 2 C. sugar to the filling instead of 2.5 C. and they still turned out awesome. Thank you so much for the delicious recipe! 🙂
Sarah thanks for the great intel, 2 cups sugar works just as well! I agree that the main thing here is plenty of lemony tartness.
We adore these bars!
So glad you love these as much as we do!